oooo
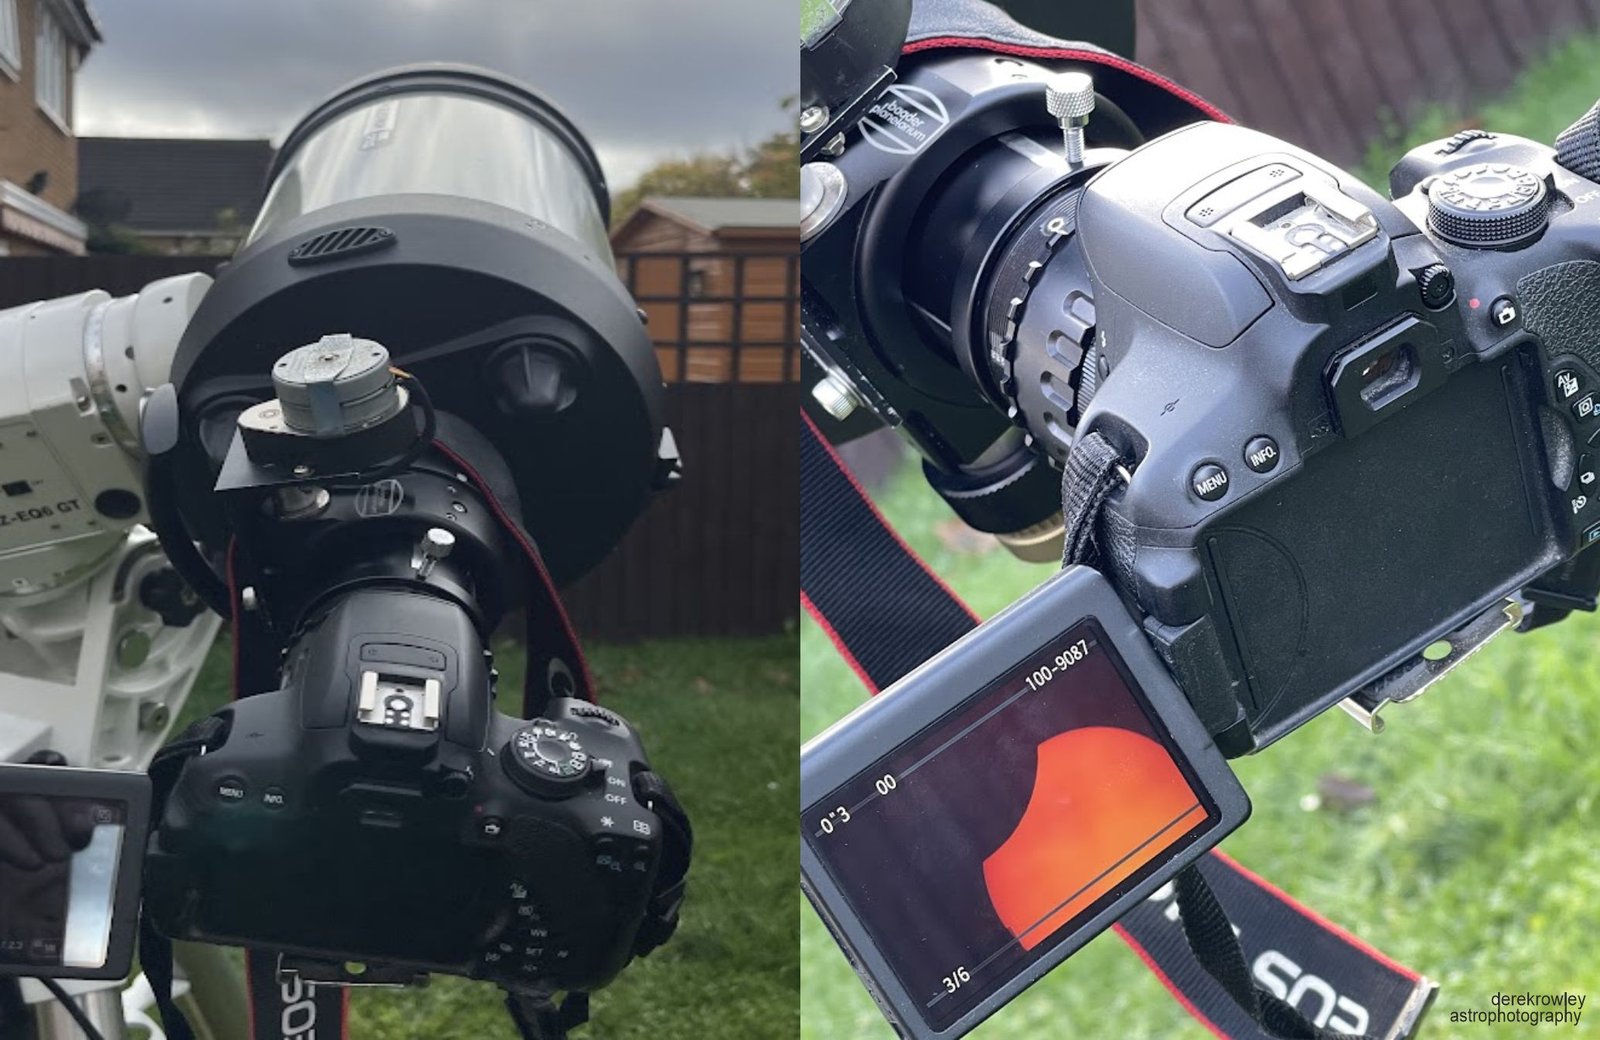
To attach a DSLR camera to a telescope
o
oooo
oooo
DSLR
o
DSLR stands for Digital Single-Lens Reflex
oooo
DSLR = Digital:
It uses an electronic image sensor to capture photos instead of traditional photographic film.
DSLR = Single-Lens:
It uses the same single interchangeable lens for both framing/previewing and taking the actual picture.
o
DSLR = Reflex:
It uses an internal mirror and prism system that bounces light from the lens up into an optical viewfinder so you see a direct, real-time preview of the scene.
o
When you take a picture, the mirror flips out of the way so light hits the sensor
oooo
oooo
oooo
oooo
oooo

oooo
oooo
Required Hardware
Here is the step-by-step process and the essential hardware you need.
oooo
Required Hardware
o
O
T-Ring (Camera-Specific):
A mechanical adapter tailored to your specific camera brand and lens mount (for example: Canon EF/RF, Nikon F/Z, Sony E) – it snaps onto your DSLR camera body just like a regular lens.
T-Adapter / Nosepiece (Telescope-Specific)
A hollow metal tube (usually 1.25″ or 2″ in diameter) that screws into the T-Ring on one end and slides directly into your telescope’s focuser drawtube or visual back on the other.
o
o
Barlow Lens or Focal Reducer (Optional)
Barlow Lens:
– Increases focal length (magnification) for small targets like planets or the Moon.
– Often essential for Newtonian reflectors that lack enough inward focus travel.
– When racked slightly out of focus, the round “donut” or diffraction rings appear flattened, square, or distorted along the edges instead of concentric and perfectly circular.
o
Focal Reducer / Field Flattener:
– Reduces focal length for wider fields of view and flattens image curvature for deep-sky targets.
o
o
oooo
oooo
oooo
oooo
oooo
oooo
Step-by-Step Setup Guide
oooo
oooo
Prepare the DSLR
DSLR:
Turn off the camera.
o
Remove the camera lens and attach the T-Ring to the camera body until it clicks into place.
Screw the T-Adapter (nosepiece) into the front threads of the T-Ring.
o
Prepare the Telescope:
Remove any star diagonals, eyepieces, or visual adapters from your telescope’s focuser.
o
Mount the Camera
Tighten the thumbscrews or compression ring on the focuser to securely clamp the assembly in place.
o
o
oooo
.
Camera Settings
oooo
Mode:
Set the camera dial to Manual (M).
o
Shutter Release:
Enable “Release shutter without lens” in your camera menu (since the camera won’t detect an electronic lens attached).
o
ISO:
Start around ISO 800 to 1600 for deep-sky objects or ISO 100 to 400 for the Moon.
o
Focusing: Switch your camera to Live View, zoom in 10x on a bright star or the Moon on the LCD screen, and manually turn the telescope’s focus knob until the star is as small and pinpoint as possible.
o
o
oooo
oooo
oooo
oooo
oooo
oooo
oooo
oooo
Common Troubleshooting Tips
oooo
oooo
Cannot Reach Inward Focus (Reflectors/Newtonians):
Many Newtonian telescopes do not have enough inward focuser travel to reach focus with a DSLR sensor.
o
To fix this, insert a 2x Barlow lens between the T-Adapter and the focuser, which pushes the focal point further outward.
o
o
Vibration Blur:
Touching the shutter button causes shake.
o
Use an intervalometer, a remote shutter release cable, or the camera’s built-in 2-second exposure delay timer.
o
o
oooo
oooo
oooo
Back to
oooo
Back to page 26
Next to page 28
oooo
Page 27 – Attaching a DSLR to a Telescope Derek Rowley – Derekscope’s BSL Guide to Deep-Sky Imaging
oooo
oooo